MainActivity
...더보기
|
1
2
3
4
5
6
7
8
9
10
11
12
13
14
15
16
17
18
19
20
21
22
23
24
25
26
27
28
29
30
31
32
33
34
35
36
37
38
39
40
41
42
43
44
45
46
47
48
49
50
51
52
53
54
55
56
57
58
59
60
61
62
63
64
65
66
67
68
69
70
71
72
73
74
75
76
77
78
79
80
81
82
83
84
85
86
87
88
89
90
91
92
93
94
95
96
97
98
99
100
101
102
103
104
105
106
107
108
109
110
111
112
113
114
115
116
117
118
119
120
121
122
123
124
125
126
127
128
129
130
131
132
|
package com.example.boostcoursepractice;
import android.content.Intent;
import android.os.AsyncTask;
import android.os.Bundle;
import com.android.volley.AuthFailureError;
import com.android.volley.Request;
import com.android.volley.RequestQueue;
import com.android.volley.Response;
import com.android.volley.VolleyError;
import com.android.volley.toolbox.StringRequest;
import com.android.volley.toolbox.Volley;
import com.google.android.material.floatingactionbutton.FloatingActionButton;
import com.google.android.material.snackbar.Snackbar;
import android.os.Handler;
import android.os.Message;
import android.util.Log;
import android.view.View;
import androidx.annotation.NonNull;
import androidx.core.view.GravityCompat;
import androidx.appcompat.app.ActionBarDrawerToggle;
import android.view.MenuItem;
import com.google.android.material.navigation.NavigationView;
import com.google.gson.Gson;
import androidx.drawerlayout.widget.DrawerLayout;
import androidx.appcompat.app.AppCompatActivity;
import androidx.appcompat.widget.Toolbar;
import androidx.fragment.app.Fragment;
import android.view.Menu;
import android.widget.Button;
import android.widget.EditText;
import android.widget.FrameLayout;
import android.widget.TextView;
import android.widget.Toast;
import java.io.BufferedReader;
import java.io.InputStreamReader;
import java.io.ObjectInputStream;
import java.io.ObjectOutputStream;
import java.net.HttpURLConnection;
import java.net.Socket;
import java.net.URL;
import java.util.HashMap;
import java.util.Map;
public class MainActivity extends AppCompatActivity {
TextView textView;
@Override
protected void onCreate(Bundle savedInstanceState) {
super.onCreate(savedInstanceState);
setContentView(R.layout.activity_main);
textView = (TextView) findViewById(R.id.textView);
Button button = (Button) findViewById(R.id.button);
button.setOnClickListener(new View.OnClickListener() {
@Override
public void onClick(View view) {
sendRequest();
}
});
if(AppHelper.requestQueue == null) AppHelper.requestQueue = Volley.newRequestQueue(getApplicationContext());
}
public void sendRequest()
{
//String url = "http://www.google.co.kr";
String url = "http://www.kobis.or.kr/kobisopenapi/webservice/rest/boxoffice/searchDailyBoxOfficeList.json?key=430156241533f1d058c603178cc3ca0e&targetDt=20120101";
StringRequest request = new StringRequest(
Request.Method.GET,
url,
new Response.Listener<String>() {
@Override
public void onResponse(String response) {
//println("응답 -> " + response);
processResponse(response) ;
}
},
new Response.ErrorListener() {
@Override
public void onErrorResponse(VolleyError error) {
println("에러 -> " + error.getMessage());
}
}
){
@Override
protected Map<String, String> getParams() throws AuthFailureError {////Post방식으로 파라미터를 전달해주고싶을 때
Map<String, String> params = new HashMap<String, String>() ;
return params ;
}
};
request.setShouldCache(false);
AppHelper.requestQueue.add(request);
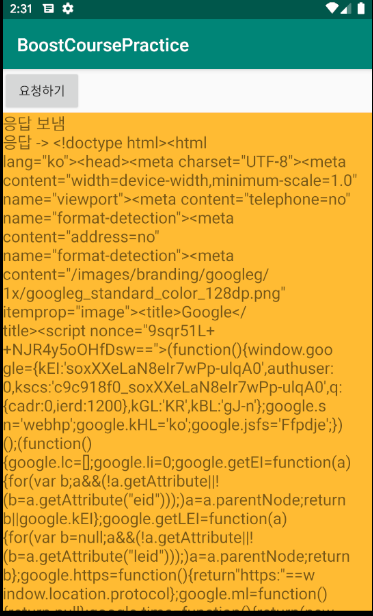
println("응답 보냄");
}
public void processResponse(String response)
{
Gson gson = new Gson();
MovieList movieList = gson.fromJson(response, MovieList.class) ;
if(movieList != null)
{
int cnt = movieList.boxOfficeResult.dailyBoxOfficeList.size();
for(int i=0; i<cnt ; i++)
{
println(movieList.boxOfficeResult.dailyBoxOfficeList.get(i).movieNm);
}
}
}
public void println(String data) {
textView.append(data + "\n");
}
}
|
cs |
AppHelper
...더보기
|
1
2
3
4
5
6
7
8
9
10
|
package com.example.boostcoursepractice;
import com.android.volley.RequestQueue;
public class AppHelper
{
public static RequestQueue requestQueue;
}
|
cs |
MovieList
...더보기
|
1
2
3
4
5
6
|
package com.example.boostcoursepractice;
public class MovieList {
MovieListResult boxOfficeResult ;
}
|
cs |
MovieListResutlt
...더보기
|
1
2
3
4
5
6
7
8
9
10
11
|
package com.example.boostcoursepractice;
import java.util.ArrayList;
public class MovieListResult {
String boxofficeType ;
String showRange;
ArrayList<Movie> dailyBoxOfficeList = new ArrayList<Movie>();
}
|
cs |
Movie
...더보기
|
1
2
3
4
5
6
7
8
9
10
11
12
13
14
15
16
17
18
19
20
21
22
23
|
package com.example.boostcoursepractice;
public class Movie {
String rnum;
String rank;
String rankInten;
String rankOldAndNew;
String movieCd;
String movieNm;
String openD;
String salesAmt;
String salesShare;
String salesInten;
String salesChange;
String salesAcc;
String audiCnt;
String audiInten;
String audiChange;
String audiAcc;
String scrnCnt;
String showCnt;
}
|
cs |
activity_main_xml
...더보기
|
1
2
3
4
5
6
7
8
9
10
11
12
13
14
15
16
17
18
19
20
21
22
23
24
25
26
27
28
29
30
31
32
33
34
|
<?xml version="1.0" encoding="utf-8"?>
<LinearLayout xmlns:android="http://schemas.android.com/apk/res/android"
xmlns:app="http://schemas.android.com/apk/res-auto"
xmlns:tools="http://schemas.android.com/tools"
android:layout_width="match_parent"
android:layout_height="match_parent"
android:orientation="vertical">
<Button
android:id="@+id/button"
android:layout_width="wrap_content"
android:layout_height="wrap_content"
android:text="요청하기" />
<ScrollView
android:layout_width="match_parent"
android:layout_height="match_parent"
android:background="@android:color/holo_orange_light">
<LinearLayout
android:layout_width="match_parent"
android:layout_height="wrap_content"
android:orientation="vertical">
<TextView
android:id="@+id/textView"
android:layout_width="match_parent"
android:layout_height="wrap_content"
android:textSize="18dp" />
</LinearLayout>
</ScrollView>
</LinearLayout>
|
cs |
우선 JSON 형식을 자바의 객체로 만들기 위해서는 GSON이라는 외부라이브러리를 써야 한다. 그러기 위하여 gradle에 implementation 'com.google.code.gson:gson:2.8.2' 을 추가해야만 한다. 이렇게 하고 우선 JSON형식에 맞게 클래스를 만들어 주어야한다. 여기서는 영화진흥위원회의 예제 JSON을 썼고 그에 맞게 MovieList, MovieListResult, Movie 이렇게 3개의 클래스를 만들어 주었다. 마지막으로 아래의 코드처럼
Gson gson = new Gson();
MovieList movieList = gson.fromJson(response, MovieList.class) ;
이렇게 해주면 우리가 만든 클래스에 gson을 이용하여 json데이터를 객체로 만들어 준다. 그것을 이용하면 된다.

'2019 summer 부스트코스 에이스(안드로이드 프로그래밍) > 5. 네트워킹' 카테고리의 다른 글
| 5-6-1 이미지 다운로드 (0) | 2019.08.17 |
|---|---|
| 5-4-1 Volley 사용하기 (0) | 2019.08.17 |
| 5-3-2 웹으로 요청하기 (0) | 2019.08.17 |
| 5-2-1 소켓 사용하기 (0) | 2019.08.15 |
| 5-1-1 스레드 사용하기 / 5-1-2 AsyncTask 사용하기 (0) | 2019.08.15 |